Introduction
Ladies and gentlemen, developers, and enthusiasts, welcome to today's presentation where we'll explore the world of collaborative coding and version control. Imagine a world where tracking changes in your project is as seamless as the flow of code itself. Today, we delve into the mystery behind one of the most powerful tools in a developer's toolkit - Git.
Git isn't just a three-letter word; it's the wizardry that transforms chaotic coding endeavors into a symphony of collaboration. Whether you're a solo coder or part of a dynamic team, Git plays the role of a silent conductor, orchestrating changes, preserving history, and ensuring that your codebase remains harmonious.
In the next few minutes, we'll begin demystifying Git, exploring its roots, understanding its key concepts, and unraveling the magic that happens behind the scenes. So, buckle up as we embark on a journey to answer the fundamental question: What is Git, and why is it an indispensable companion for every developer? Let's embark on this coding adventure together!
Git Introduction
What is Git?
Git is a distributed version control system that enables collaboration, tracking changes, and managing projects efficiently. It's a system that records changes to files over time, allowing specific versions to be recalled later. Consider a scenario where developers work simultaneously on a project, each adding code on their local machines and pushing changes to a remote repository. How do they keep track of changes, determine the latest version, or identify who made specific changes? Version control comes into play, enabling developers to track changes, collaborate, and manage project history. Among the available version control systems, Git, developed in 2005 by Linus Torvalds, is the most widely used.

Why Git?
Git offers functionality, performance, security, and flexibility that meet the needs of most teams and individual developers. Its distributed nature ensures the entire codebase and history reside on each developer's machine, allowing for easy branching and merging. Being the de facto standard, many developers and college graduates possess Git experience. Moreover, as an open-source project, Git benefits from robust support and continuous improvements. Its learn-once-use-everywhere design, simple and consistent command line interface, and flexibility for diverse workflows make it a highly adaptable version control system.
Git Basics
Key Concepts
- Repository: A hidden directory that stores all project files, directories, and their complete history. It's essential for collaborative development, allowing multiple developers to work simultaneously on a project. Repositories can be local, shared, or remote.
- Commit: A snapshot of changes made to the repository at a specific time, forming a permanent record. Each commit is uniquely identified by a hash and contributes to the repository's commit history.
- Branch: An independent line of development, enabling isolated work on features or bug fixes. It points to a specific commit and aids in organizing changes and maintaining a clean project history.
Git Workflow
Overview of a typical Git workflow:
- Working Directory: Where changes to files occur, monitored by Git to track modifications. Also known as the "working tree" or "working copy".
- Staging Area: A space to prepare and review changes before committing. Also known as the "index" or "cache". It stores information about the next commit.

Note: This video is not 1 hour long. It's only 2 minutes.
Exercise 1
Welcome to the Git Essentials first exercise! This exercise is designed to guide you through essential Git processes using various operating systems and SSH keys. Below is a breakdown of the tasks you'll explore:
- Generate SSH Keys in Windows
- Generate SSH Keys in Linux
- Add SSH Key
- Create Repository
- Use Git Workflow
- Modify Files
- Push work to Github
- Cheatsheet
- Git best practices
Understanding SSH Keys
SSH keys are crucial for secure communication between your computer and remote servers. They act as a secure way to authenticate and establish secure connections, ensuring that data exchanged between systems is encrypted and protected from unauthorized access.
These keys provide a way to verify your identity without a password, making the authentication process more secure and convenient. They consist of a public key, which you share with others or services, and a private key, which remains exclusively on your machine.
GitHub strongly encourages SSH keys due to their security benefits and the limitations of HTTPS. While HTTPS is still an option, it can be less convenient due to frequent password prompts. SSH keys, on the other hand, offer a more secure and seamless way to authenticate without the need for constant password entry. Additionally, GitHub has set rate limits for unauthenticated use of their API, making SSH keys almost essential for smoother and more efficient interactions with their services.
Generating SSH Keys in Windows 10
Generate SSH Key with OpenSSH Client
Step 1: Verify OpenSSH Client Installation
- Open Settings, click on Apps.
- Under Optional Features, check if OpenSSH Client is listed.
- If not listed, add it by clicking "Add a feature" and selecting OpenSSH Client.
Step 2: Open Command Prompt
- Press the Windows key.
- Type
cmd. - Right-click Command Prompt and select "Run as Administrator."
Step 3: Use OpenSSH to Generate SSH Key Pair
- In the command prompt, type:
ssh-keygen - Press Enter to use the default location.
- Enter a passphrase or press Enter to skip.
- The system will generate keys; locate them in
C:\Users\your_username/.ssh. - Public key:
id_rsa.pub, Private key:id_rsa
Generating SSH Keys in Linux
Generating a new SSH key
- Open Git Bash.
- Paste the following command, replacing the email with your GitHub email:
If your system doesn't support Ed25519, use:ssh-keygen -t ed25519 -C "your_email@example.com"ssh-keygen -t rsa -b 4096 -C "your_email@example.com" - Press Enter to accept the default file location.
- Type a secure passphrase when prompted.
Adding a new SSH key to your GitHub account
-
Copy the SSH public key to your clipboard. Use the following command, replacing the filename:
$ clip < ~/.ssh/{filename}.pubAlternative for Windows users
On Windows Subsystem for Linux (WSL), you can use `clip.exe`. Otherwise, locate the hidden `.ssh` folder and copy the key manually.On newer versions of Windows with PowerShell, you may use:
$ cat ~/.ssh/{filename}.pub | clipAlternatively, you can just open the file and copy its contents.
-
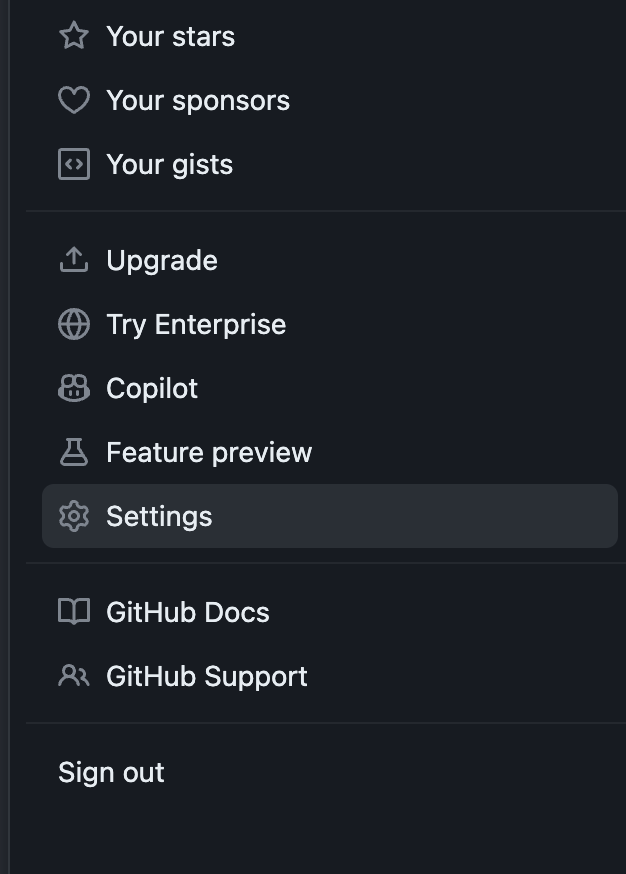
In the upper-right corner of any GitHub page, click your profile photo, then click Settings.
-
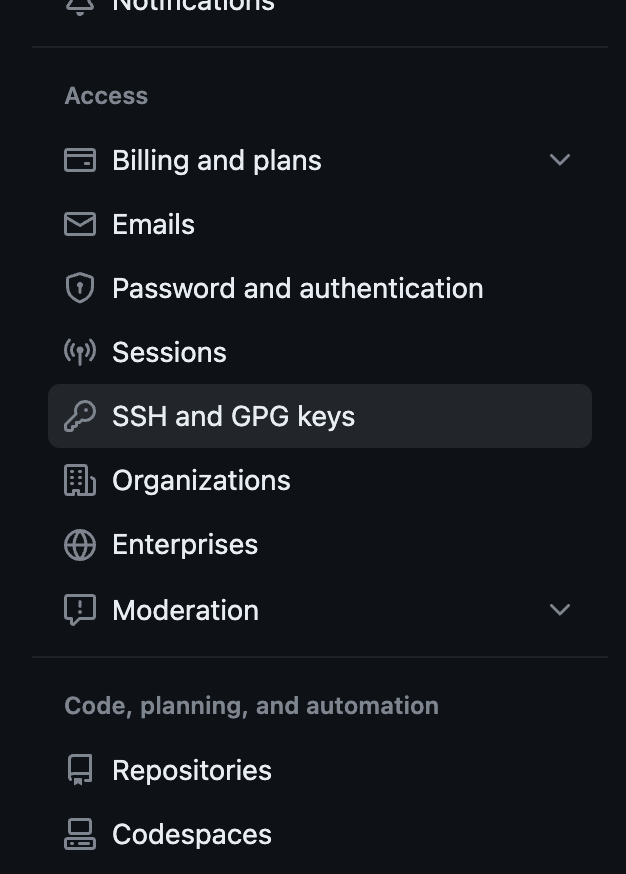
In the "Access" section of the sidebar, click SSH and GPG keys.
-
Click New SSH key or Add SSH key.
-
In the "Title" field, add a descriptive label for the new key (e.g., "Personal laptop").
-
Select the type of key: either authentication or signing.
-
In the "Key" field, paste your public key.
-
Click Add SSH key.
-
If prompted, confirm access to your GitHub account.
Create a Repository
Before You Start
- Ensure you have Git version 2.28 or later. Check your version with:
git --version - Set your local default Git branch to
mainby running:git config --global init.defaultBranch main
Create the Repository on GitHub
- Create a GitHub account if you haven't already.
- Click the "+" button on GitHub to create a new repository.
- Name it "git-test," check "Add a README file," and click "Create repository."
Clone the Repository to Your Local Machine
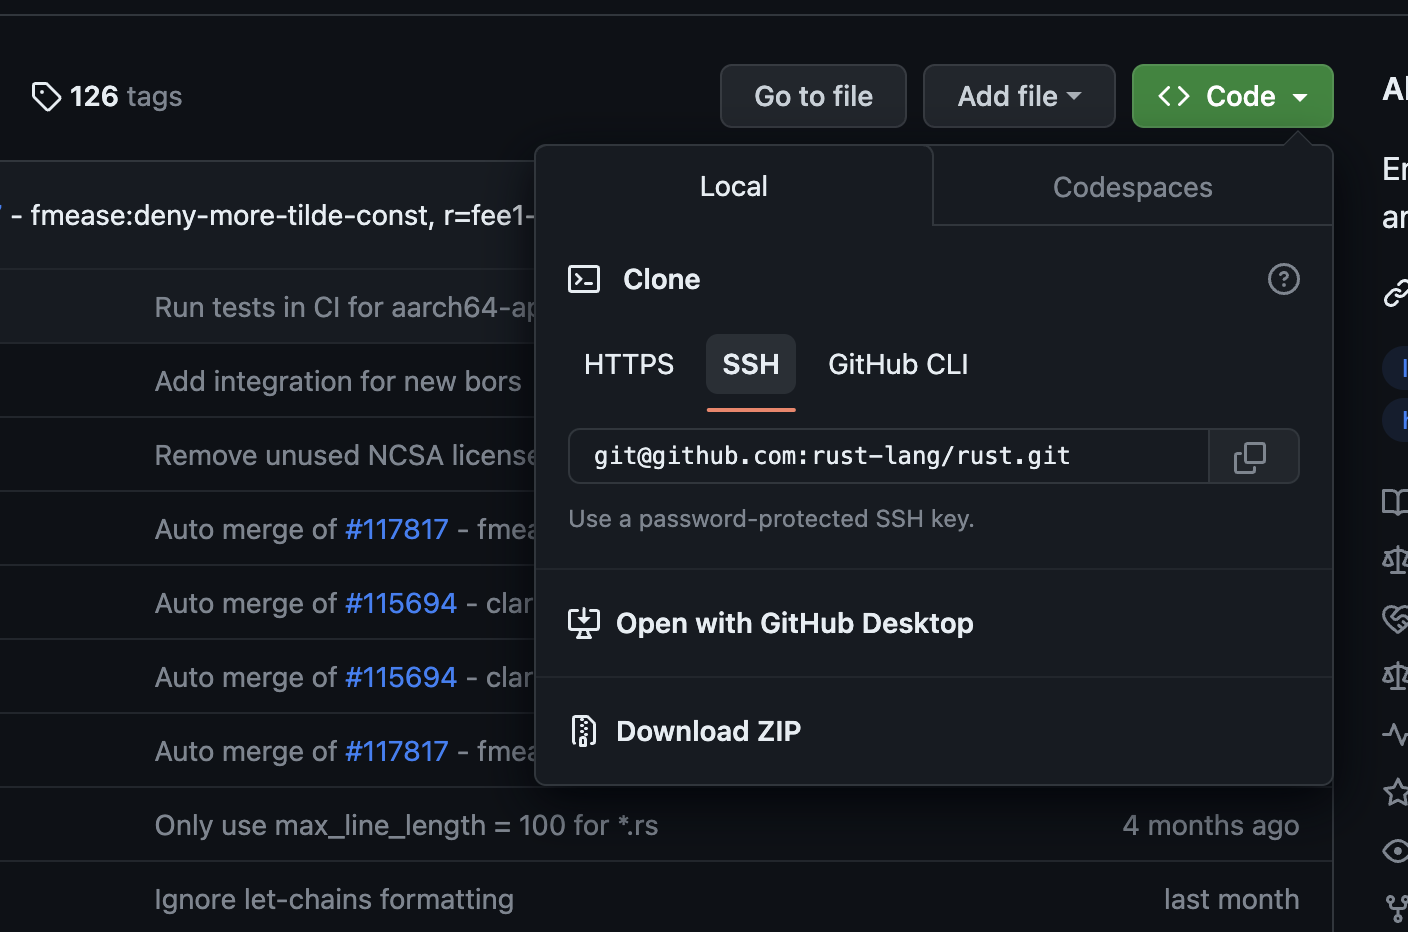
- Click the green "Code" button on your GitHub repository.
- Select the SSH option, copy the displayed URL.
- Open your terminal and create a directory named "repos" in your home folder:
mkdir ~/repos - Move into the new directory:
cd ~/repos - Clone the repository using the copied URL:
git clone git@github.com:USER-NAME/REPOSITORY-NAME.git - Verify the connection:
cd git_testandgit remote -v
You've successfully connected your GitHub repository to your local machine. The remote connection is named "origin," a default convention.
Git Workflow
Use the Git Workflow
-
Create a new file in the
git_testfolder called "gdsc.txt" with the command:touch gdsc.txt.# Create gdsc.txt using CLI touch gdsc.txt -
Check the status of your repository by typing
git statusin your terminal. The output shows thatgdsc.txtis in red, indicating it is not staged.# Check the status of the repo using CLI git status -
Add
gdsc.txtto the staging area using the command:git add gdsc.txt. This prepares the file for the commit.# Stage gdsc and check repo status again using CLI git add gdsc.txt -
Type
git statusagain. The output now showsgdsc.txtin green, indicating it is in the staging area.# Check repo status again using CLI git status -
Make a commit with the message "Add gdsc.txt" using the command:
git commit -m "Add gdsc.txt". Then, check the status once more. The output should indicate "nothing to commit, working tree clean."# Commit gdsc and check repo status again using CLI git commit -m "Add gdsc.txt" git status -
Check the commit history using git log:
# Check repo commit history using CLI git log -
The message "Your branch is ahead of 'origin/main' by 1 commit" indicates that your local branch has one more commit than the remote repository. This will be resolved when you push your changes.
Modify Files
Modify a File or Two
-
Open
README.mdin your text editor of choice. In this example, we will open the directory in Visual Studio Code by using the commandcode .inside your repository.# Edit README using text editor code .What if I don’t have Visual Studio Code?
In that case, you can use any text editor of your choice. If you’re using Windows, you can use Notepad. If you’re using Mac, you can use TextEdit. If you’re using a smart fridge, how did you get that in here? -
Add “Hello GDSC!” to line 3 of
README.mdand save the file withCtrl + S(Mac:Cmd + S). -
Go back to your terminal, or if you’re using Visual Studio Code, you can open the built-in terminal by pressing
Ctrl + \(backtick). Then typegit status. You’ll notice thatREADME.mdis now shown as not staged or committed.# Check repo status again using CLI git status -
Add
README.mdto the staging area withgit add README.md.# Stage README changes and check repo status again using CLI git add README.mdCan you guess what
git statuswill output now?README.mdwill be displayed in green text. That meansREADME.mdhas been added to the staging area. -
Open
gdsc.txt, add your name, occupation, a favorite hobby and something you dislike, save it, and stage it. You can usegit add .to add all files in the current directory and all subsequent directories to the staging area. Then, typegit statusonce more, and everything should now be in the staging area.Example
gdsc.txtName: Armand Occupation: Master's Student in Software Engineering at Babes-Bolyai University Hobby: Playing Valorant Dislike: CFR# Stage all other files in repo and check repo status again using CLI git add . -
Finally, let’s commit all of the files that are in the staging area and add a descriptive commit message:
git commit -m "Edit README.md and gdsc.txt". Then, typegit statusonce again, which will output “nothing to commit.”# Commit repo changes again and check repo status again using CLI git commit -m "Edit README.md and gdsc.txt" git status -
Take one last look at your commit history by typing
git log. You should now see three entries.# Check repo commit history using CLI git log
Pushing to Remote Repository
Push Your Work to GitHub
-
Finally, let’s upload your work to the GitHub repository you created at the start of this tutorial.
# Push changes to remote using CLI
git push
To be more specific, you can type
git push origin main. Since you are not dealing with another branch (other thanmain) or a different remote, you can leave it asgit pushto save a few keystrokes.“Support for password authentication was removed on August 13, 2021. Please use a personal access token instead.”
**Note:** If you receive a message that says “Support for password authentication was removed on August 13, 2021. Please use a personal access token instead,” at this point, you cloned with HTTPS, not SSH.What is origin?
The origin is the default name given to the remote repository you cloned from. You can view the remote repositories using `git remote -v`. -
Type
git statusone final time. It should output “Your branch is up to date with ‘origin/main’. Nothing to commit, working tree clean”.# Check repo status again to confirm local repo is up to date with remote using CLI git status -
When you reload the repository on GitHub, you should see the
README.mdandgdsc.txtfiles that you just pushed there from your local machine.
Git Essentials Cheatsheet
Here's a reference list of commonly used Git commands:
Commands related to a remote repository:
git clone git@github.com:USER-NAME/REPOSITORY-NAME.gitgit pushorgit push origin main
Commands related to the workflow:
git add .git commit -m "A message describing the changes"
Commands related to checking status or log history:
git statusgit log
The basic Git syntax is program | action | destination.
For example:
git add .is read asgit | add | ., where the period represents everything in the current directory.git commit -m "message"is read asgit | commit -m | "message".git statusis read asgit | status | (no destination).
Git Best Practices
Using Git effectively can greatly enhance your development workflow. Here are some valuable best practices to consider:
Collaborative and Independent Work
Git serves you well whether you're collaborating with a team or working solo. It's versatile and adapts to different scenarios.
Atomic Commits
Atomic commits are a fundamental concept in Git. They involve making small, focused commits that encapsulate a single change. This practice makes it easier to manage your project and maintain a clear history. For example, if you're working on a web application and you fix a bug related to user authentication, create a separate commit for it:
- Fix user authentication bug
Meaningful Commit Messages
A well-crafted commit message is a crucial aspect of Git best practices. It should provide a clear and concise summary of your changes. Additionally, include a more detailed explanation when necessary. Here's an example of a meaningful commit message:
- Implement new feature for user profile
  - This commit adds a user profile page with user details and profile picture functionality. It addresses issue #123.
Customizing Git Commit Message Editor
Git allows you to customize your commit message editor. If you prefer using Visual Studio Code, you can set it as your default editor for Git commit messages. To do this, run the following command:
git config --global core.editor "code --wait"
This command configures Git to use Visual Studio Code as the default commit message editor.
Collaboration in Git
Key Concepts
- Cloning: Creating a local copy of a repository. This enables work on the project locally and facilitates pushing changes to the remote repository.
- Push/Pull: The primary methods of syncing changes between a local and remote repository. Pushing sends committed changes to a remote repository, while pulling retrieves changes from a remote repository.
- Merge: The process of combining changes from different branches. Typically done when a feature branch is complete and ready to integrate into the main branch.
- Forking: Creating a copy of a repository under your account. This allows experimentation with changes without affecting the original project.
Pull Requests
Pull requests simplify collaboration using GitHub. They notify project maintainers about changes in a forked repository, making it easier to review and discuss proposed changes before integration into the official project. Pull requests are commonly used to propose changes, notify maintainers about changes in a forked repository, discuss proposed changes, and collaborate with other developers.
When submitted, pull requests are reviewed by project maintainers. They can approve, request changes, or close the request. They're an excellent way to contribute to open source projects and gain experience with Git and GitHub. Merging pull requests offers two options:
- Merge Commit: Creates a new commit to record changes, the default option.
- Squash and Merge: Combines all commits into a single commit before merging, keeping the commit history concise.

Basic Commands
Example Commands:
git init: Initialize a new Git repository.git add <file>: Add changes to the staging area.git commit -m "message": Commit changes with a descriptive message.git status: Check the status of your working directory.git log: View the commit history.git diff: View changes made to a file.git checkout <branch>: Switch to a different branch. Usegit checkout -b <branch>to create a new branch.git reset <file>: Remove a file from the staging area.git rm <file>: Remove a file from the working directory and staging area.git mv <file> <new file>: Rename a file and stage the change.git remote add origin <url>: Add a remote repository.git push origin <branch>: Push changes to a remote repository.git pull origin <branch>: Pull changes from a remote repository.git clone <url>: Clone a remote repository to your local machine.git merge <branch>: Merge a branch into the active branch.git fetch: Download changes from a remote repository.git stash: Temporarily store changes that you don't want to commit.git push --force: Force push changes to a remote repository (Use with caution).
Best Practices
Recommendations for effective Git usage:
- Descriptive Commit Messages: Write messages explaining changes made, avoiding vague statements like "fixed bug". This aids in tracking changes and understanding history.
- Regular Pulling Changes: Pull changes regularly from the remote repository to keep the local repository updated and reduce the risk of conflicts.
- Branch Naming Conventions: Use descriptive branch names, making it easier to understand their purpose and track changes.
- Code Reviews and Collaboration: Utilize pull requests for reviewing proposed changes before integrating them into the official project. It's a great way to collaborate and learn about Git and GitHub.
Collaboration in Git
Merging
Having multiple branches is extremely convenient to keep new changes separated and avoid pushing unapproved or broken changes to production. When the changes are approved, integrating them into the production branch is essential.
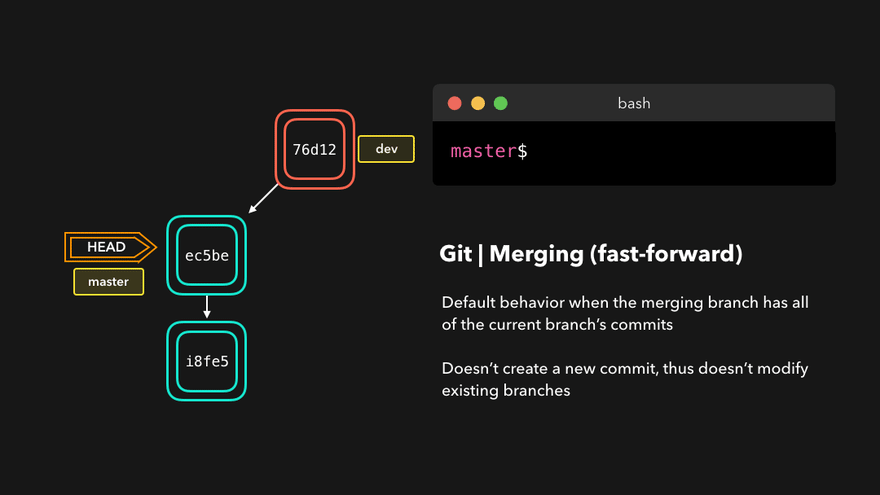
Fast-forward (--ff)
A fast-forward merge occurs when the current branch has no additional commits compared to the branch being merged. Git prefers this as the easiest option: it merges the commit(s) from the branch being merged into the current branch without creating a new commit.
No-fast-forward (--no-ff)
In case the current branch has commits not present in the branch to be merged, Git performs a no-fast-forward merge. This creates a new merging commit on the active branch, integrating changes from both branches.

Merge Conflicts
Merging branches with conflicting changes in the same lines or with deleted files that were modified elsewhere can cause merge conflicts. Git highlights these conflicts, enabling manual resolution by removing unwanted changes, saving, re-adding the changed file, and committing the changes.

Rebasing
Git rebase copies commits from the current branch and places them on top of the specified branch. Unlike merging, rebasing doesn't attempt to decide which files to keep, maintaining the branch's latest changes and avoiding merging conflicts.

Rebasing is ideal when integrating updates from the master branch into a feature branch, preventing future merging conflicts.
Interactive Rebase
Interactive rebase allows modification of commits before rebasing, offering six actions:
- reword: Edit the commit message.
- edit: Amend the commit.
- squash: Combine the commit into the previous one.
- fixup: Merge the commit into the previous one without retaining the commit's log message.
- exec: Execute a command on each commit being rebased.
- drop: Remove the commit.

Feel free to use these actions for full control over your commits, whether removing or merging them. Interactive rebase facilitates the modification of commits.
Soft Reset
A soft reset shifts HEAD to the specified commit without discarding changes introduced by the following commits. It preserves access to the changes made in the previous commits, enabling fixing and recommitting them later.

Hard Reset
A hard reset returns Git's state to the specified commit, including changes in the working directory and staged files, discarding all changes introduced after the commit.

Reverting
Git revert creates a new commit that undoes the changes introduced by the specified commit, ensuring the commit history remains unaltered.
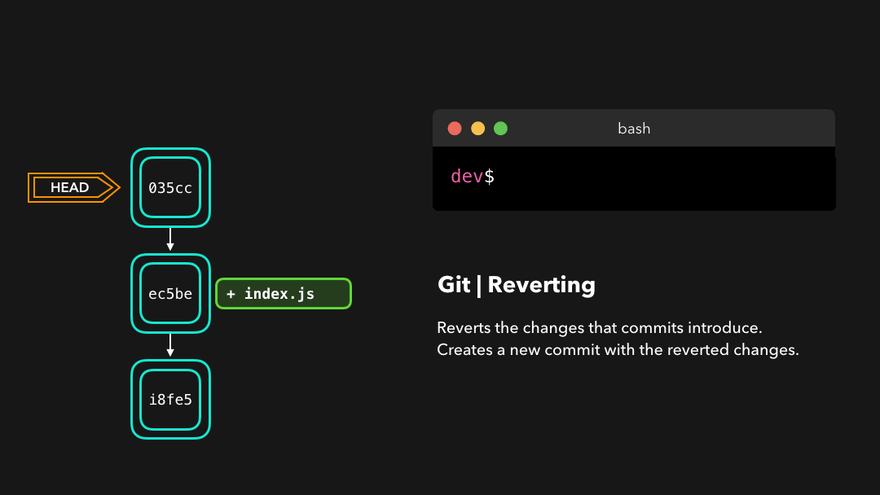
Git revert is useful for undoing a specific commit without altering the branch's history.
Exercise 2
Welcome to the Git Essentials second exercise! In this exercise, you'll dive into resolving merge conflicts in a collaborative Git environment. The focus will be on updating personal information in a shared file, generating merge conflicts, and exploring different conflict resolution strategies. Here's the tasks you'll be performing:
- Clone Repository
- Add Personal Information
- Create Pull Requests
- Resolve Merge Conflicts
- Rebase, Squash, and Merge
- Commit History and Interactive Rebase
Instructions
-
Updating Your Profile:
- Your task is to update the
gdsc.txtfile in repositories belonging to your fellow participants. Add your name, occupation, favorite hobby, and something you dislike to theirgdsc.txt.
- Your task is to update the
-
Creating Pull Requests:
- Initiate a Pull Request in the repository you're modifying, aiming to update the
gdsc.txtfile. - Ensure your PR clearly states the purpose: "Adding Personal Information."
- Initiate a Pull Request in the repository you're modifying, aiming to update the
-
Simulating Merge Conflicts:
- Your goal is to make changes to the same line or section of the
gdsc.txtfile in repositories of other participants. - When your PRs are submitted, try merging them into your repository. You may face merge conflicts due to changes in the same sections of the file.
- Your goal is to make changes to the same line or section of the
-
Resolving Conflicts:
- Use Git commands (
git status,git diff,git checkout --ours/--theirs) to identify conflicting sections. - Discuss and communicate effectively with the repository owners to decide on retaining specific changes.
- Resolve conflicts either by manual editing or using Git tools, ensuring file consistency and preventing data loss during conflict resolution.
- Use Git commands (
-
Exploring Git Strategies:
- Experiment with different merge strategies (merge, rebase, squash) while integrating changes from the main repository.
- Consider the advantages and limitations of each strategy in managing conflicts and maintaining a clean commit history.
-
Reviewing Commit History and Interactive Rebase:
- Analyze commit history using
git log. - Learn about interactive rebase by renaming a commit, squashing, or rearranging commits based on a previous commit.
- Analyze commit history using
Cloning Repositories
In this section, we'll cover the process of cloning repositories from GitHub onto your local machine.
1. Sharing Repository URLs
Each participant sitting at the same table should share their repository URL. This URL can be obtained from their GitHub repository.
2. Accessing Private Repositories (If applicable)
If the repositories are private, participants need to grant access permissions to others. Ask the repository owner to grant access to you by having him follow these steps:
Granting Permissions for Private Repositories on GitHub
- Go to the repository on GitHub.
- Click on "Settings" in the repository.
- Select
Collaborators and Teamsfrom the sidebar. - Under
Manage access, click onAdd people. - Enter the GitHub username or email of the person you want to grant access to.
- Select the write permission level.
- Finally, click on "Add [username/email] to this repository".
3. Cloning the Repository
For each participant, follow these steps to clone the repository to your local machine:
a. Open your terminal or Git Bash.
b. Use the git clone command followed by the repository URL:
git clone <repository_URL>
c. This will create a local copy of the repository on your machine.
If all went well with adding an SSH key in the previous exercise, you should be able to clone the repository without any issues. If you're still having trouble, ask for a volunteer to help you out.
4. Verifying the Clone
Once the cloning process is completed, navigate into the cloned directory using the cd command in the terminal to ensure the repository has been successfully cloned.
Following these steps will allow each participant to clone repositories onto their local machines, enabling them to contribute and collaborate effectively.
Add Personal Information
Objective
The objective of this task is to update the gdsc.txt file in repositories owned by other participants with your personal information.
Steps
-
Create a New Branch:
-
In your terminal, create a new branch for your changes using:
git checkout -b {your-name}What name should I use for my branch?
You can use any name you want for your branch.However, it's best practice to use a descriptive name that reflects the purpose of the branch. In this case, you can use your own name as the branch name, to avoid branch name clashes with the other participants.
-
-
Open
gdsc.txt:- Navigate to the repository of a fellow participant in your preferred code editor.
-
Update
gdsc.txt:- Locate the
gdsc.txtfile and add your name, occupation, favorite hobby, and something you dislike in the existing format, similarly to how the repository owner has added their information.
- Locate the
-
Save Changes:
- Save the modifications made to the
gdsc.txtfile.
- Save the modifications made to the
-
Stage Changes:
- In your terminal, add the modified file to the staging area using the command:
git add gdsc.txt -
Commit Changes:
- Commit the changes with a descriptive message:
git commit -m "Added personal information to gdsc.txt" -
Push to Repository:
- Push the changes to the repository using the command:
git push --set-upstream origin {branch-name}What is --set-upstream?
The `--set-upstream` flag is used to set the default remote branch for the current local branch. This allows you to use `git push` without specifying the remote branch name.
- Push the changes to the repository using the command:
Creating a Pull Request on GitHub
-
Navigate to the Repository:
- Visit the repository on GitHub where you've made changes that you want to merge.
-
Switch to the Branch:
- If the changes are in a specific branch, ensure you're on that branch.
-
Click on "New Pull Request":
- On the repository page, click on the "Pull Requests" tab.
-
Compare Changes:
- Click the "New pull request" button. GitHub will automatically detect the base and compare branches. Ensure the changes you want to merge are displayed correctly.
-
Add Title and Description:
- Provide a title and description that clearly explains the purpose of the Pull Request. Describe the changes and why they are being made.
-
Review Changes:
- Review the changes tab to ensure all modifications you expect are included.
-
Assign Reviewers (If Required):
- Assign specific reviewers for your Pull Request, if necessary. Reviewers will be notified to assess your changes.
-
Labels, Milestones, and Projects (Optional):
- Apply labels, associate milestones, or link the PR to a project board if your repository uses these features.
-
Create the Pull Request:
- Click "Create Pull Request" to officially open the Pull Request.
Resolve Merge Conflicts
Scenario
Ideally, each repository should have at least two Pull Requests (PRs) modifying the same gdsc.txt file with contact information. Merging one PR may cause a conflict in the other PR due to changes in the same file.
Steps to Solve Conflicts
The primary difference between the merge and rebase approaches lies in how they integrate changes.
Merge combines the commit histories of the divergent branches, creating a new commit that reflects the combined changes. It retains the original commit history but may result in "merge commits," which explicitly mark where the branches were merged.
Rebase, on the other hand, rewrites the commit history by placing the local branch's commits on top of the latest changes from the main branch. This creates a linear and cleaner history but alters commit timestamps.
Merge Approach:
-
Checkout the Branch:
- Navigate to the branch with the conflicting changes:
git checkout branch-name
- Navigate to the branch with the conflicting changes:
-
Pull the Latest Changes:
- Fetch the latest changes from the remote repository:
git pull origin main
- Fetch the latest changes from the remote repository:
-
Resolve Conflicts Locally:
- Open the
gdsc.txtfile in your code editor. - Resolve conflicts using the editor's conflict resolution tool or manually by editing the file.
- The conflict markers (
<<<<<<<,=======,>>>>>>>) denote conflicting sections. - Use the editor's tool to choose and retain the desired changes from both versions.
- Ensure the file reflects the intended information after conflict resolution.
- The conflict markers (
- Open the
-
Stage and Commit Changes:
- After resolving conflicts, stage the modified file:
git add gdsc.txt - Commit the changes:
git commit -m "Resolved merge conflict in gdsc.txt"
- After resolving conflicts, stage the modified file:
-
Push Changes to the Branch:
- Push the changes to the branch:
git push origin branch-name
- Push the changes to the branch:
-
Merge the PR:
- Proceed to merge the conflicted PR through the repository interface.
Rebase Approach:
-
Checkout the Branch:
- Navigate to the branch with the conflicting changes:
git checkout branch-name
- Navigate to the branch with the conflicting changes:
-
Rebase from Main:
- Rebase the branch with the latest changes from the main branch:
git rebase main
- Rebase the branch with the latest changes from the main branch:
-
Resolve Conflicts:
- Address any conflicts encountered during the rebase process by following the prompts in your terminal.
-
Continue Rebase:
- After conflicts are resolved, continue the rebase:
git rebase --continue
- After conflicts are resolved, continue the rebase:
-
Push the Rebased Changes:
- Push the rebased changes to the remote branch:
git push --force origin branch-name
What is --force?
The `--force` flag is used to force push the rebased changes to the remote branch. This is required because the rebase process rewrites the commit history of the branch. - Push the rebased changes to the remote branch:
-
Merge the PR:
- Proceed to merge the rebased PR through the repository interface.
Rebase, Squash, and Merge
GitHub Pull Request UI Options
In the GitHub Pull Request UI, when merging a pull request, three distinct options are available:
-
Create Merge Commit:
- This option generates a merge commit to incorporate changes. It retains the commit history of the merged branch, clearly marking the point where the branches were merged.
-
Squash and Merge:
- Choosing this option condenses multiple commits from the feature branch into a single commit before merging. It helps maintain a clean commit history, especially for branches with numerous smaller commits.
-
Rebase and Merge:
- The rebase and merge option applies the changes from the feature branch onto the base branch by restructuring the commit history. It produces a linear history, placing the feature branch's commits atop the base branch's latest changes.
Each option offers a distinct approach to integrating changes from a pull request, allowing contributors to select the method that best aligns with the project's version control and commit history preferences. These options significantly influence the resulting commit history and repository structure.
Commit History and Interactive Rebase
Understanding Commit History
Git's log command offers a view of the commit history. It displays a list of commits in reverse chronological order, showcasing commit messages, authors, and commit hashes. Participants can enter git log in the terminal to view the commit history of a repository, gaining insights into the project's development timeline.
Interactive Rebase Exercise
Let's explore the functionality of interactive rebase, focusing on squashing commits, changing messages, deleting, and picking commits in a simple exercise.
-
Squashing Commits:
- Demonstrate squashing multiple commits into a single one using
git rebase -i HEAD~N, whereNis the number of commits to include.
- Demonstrate squashing multiple commits into a single one using
-
Changing Commit Messages:
- Show how to alter commit messages during an interactive rebase by marking commits as
reword.
- Show how to alter commit messages during an interactive rebase by marking commits as
-
Deleting Commits:
- Guide participants on how to delete specific commits from the commit history using
git rebase -i.
- Guide participants on how to delete specific commits from the commit history using
-
Picking Commits:
- Illustrate how to pick specific commits and rearrange their order using
git rebase -i.
- Illustrate how to pick specific commits and rearrange their order using
Quiz